
I created a wall art focal point for the nursery to go just over the crib. It was super easy to make and thought I'd share how to do this.
First, get several frames of different sizes. You could either make them all be similar around the edges, or put together a bunch of different styles and shapes. Whatever you want.
Next, find some images that work well together. The ones I used can be downloaded here:
Page 1: http://farm3.static.flickr.com/2512/3849632257_5cb51ebe7d_o.jpg
Page 2: http://farm4.static.flickr.com/3534/3850428454_5be8a16c08_o.jpg
Make sure the images look good in silhouette and are not too complicated in shape. Make sure the sizes will be completely visible once the frame has been placed around it. I found that an 8.5 x 11 inch frame had a slight border around it so that my shape had to be no bigger than 8 x 10.5 to be totally visible.
Next, print out your images on regular printer paper. Attach the printed image with a tiny bit of repositionable glue to plain white cardstock. Make sure the glue is not permanent and will not stain the cardstock. Then carefully cut around the edges to create your silhouette.
Next, cut colored cardstock to size, attach the white image with permanent adhesive to the center of the cardstock, and place it in the frame.
Finally, hang up your wall art and enjoy.
Simple and easy.
Sunday, September 20, 2009
////
tutorial
Saturday, September 19, 2009
////
So, I've been wanting to make a dress for my little sprout to come home from the hospital in for some time now. I found this free pattern on this website: http://madebyrae.blogspot.com and the dress looked super cute!
I have fantasies that I can sew, but have never had any formal training. The tutorial was pretty easy to follow until I got to the piping and seam binding parts. After much online research, I figured it out and here it is:
Sunday, September 6, 2009
////
tutorial

I wanted to share with you the mobile I made for my yet to be born baby girl. Her nursery theme is Woodland Friends with lots of gnomes, mushrooms, deer, and other happy forest creatures.
Here are the supplies that you will need for this project:
-8.5x11-inch standard printing paper (2 sheets)
-printer
-scissors
-chipboard (one 12 x 12 sheet should be enough)
-repositionable adhesive
-white acrylic paint, woodgrain shelf liner, book pages, wallpaper, etc. (to decorate the shapes on the mobile)
-super strong glue (I used Liquid Fusion Clear Urethane Glue)
-craft knife
-wax paper
-VersaMark watermark ink (clear ink for embossing)
-UTEE (ultra thick embossing enamel)
-heating tool for embossing
-tweezers (to hold the shapes in place as you heat the UTEE)
-white wire clothes hanger
-wire cutter
-knitting needle (to wrap the wire around)
-Crop-a-dile
-fishing line
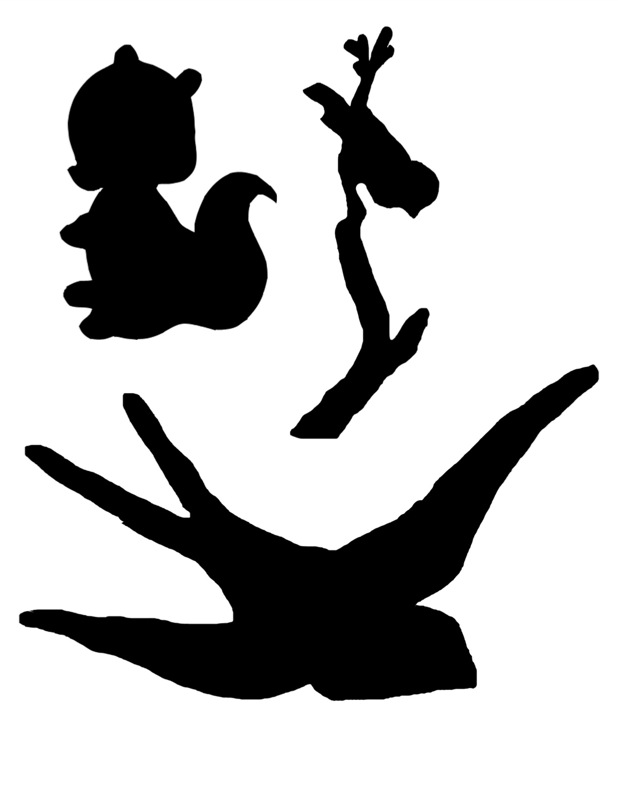
I started this project by designing the graphics. You can either use the ones that I made, or create your own, but you will need a total of seven graphics with one of them being bigger than the others. The six smaller graphics should be around 3-inches wide x 4-inches tall (depending on the specific graphic it may have slightly different dimensions as in the case with the bird on the branch in the mobile I made). The one larger graphic should be around 9-inches wide x 6-inches tall.
Here are the links to the graphics:
Page 1: http://farm3.static.flickr.com/2512/3849632257_5cb51ebe7d_o.jpg
Page 2: http://farm4.static.flickr.com/3534/3850428454_5be8a16c08_o.jpg
You should be able to print them onto 8.5 x 11-inch standard printer paper. You might need to adjust the margins to make sure none of the edges get cut off.
Once you print them out, cut out the shapes, and use them as a template to cut out the shapes on chipboard. I found that attaching them with a little repositionable adhesive made it easier to keep the image in place as you cut. If you don’t have any chipboard handy, you could use a cardboard box, or even a cereal box. You just need something that is nice and sturdy as a base for the creatures on your mobile.

Now comes the fun part! You can decorate the shapes in any way you’d like. You can use wallpaper, vintage book pages, sheet music, paint, or whatever else inspires you. I wanted something nice and simple, so I painted most of the shapes with white acrylic paint, then some of them I used a woodgrain shelf liner, and on one of the shapes I used both. I put about 3 or 4 coats of white paint on both sides of the shape to where the paint was nice and uniform in color. For the shapes that I covered in the shelf liner, I first covered one side of the shape with a thin layer of super strong quick drying glue then put the shelf liner on (being careful to make sure the grain of the wood was consistent among the shapes). After smoothing down the liner to get rid of any bubbles, I waited a couple of minutes for the glue to set then flipped the shape over and traced around the edges with my craft knife. Then I repeated this process for the other side. You can either leave the edges as they are or paint/ink them.


After you have left these to dry (I waited overnight just to make sure they are nice and “cured” before moving to the next step, but it might have been overkill) you can proceed to the (somewhat tedious) stage of enameling them.

I laid out two sheets of wax paper. One sheet will be where you sprinkle the Ultra Thick Emobssing Enamel (UTEE) to coat the piece, and the other sheet will be where you melt the UTEE with the heating tool. This keeps the UTEE crystals away from the finished pieces, which will make the whole process much easier and cleaner.
To enamel the shapes, I first placed the shape on the wax paper and covered one side with VersaMark watermark ink. I found it much easier to bring the inkpad to the shape rather than try to push the shape onto the inkpad. Then I liberally sprinkled UTEE all over the piece (POUR it on, don’t be shy, the extras just get put back into the jar) picked it up (tweezers help here) and made sure it was totally covered. You will be able to see if you missed any places with the ink, and I just carefully inked those spots and covered them with UTEE. Next you lay your shape on the other sheet of wax paper and apply your heating tool to melt the UTEE. The first layer will be really bumpy, that’s normal, this gets better with each coat. Don’t hold your heating tool too close to the shape or you risk burning the shape, especially if you used book pages or other paper items to cover your shapes. Make sure to pour the extra UTEE on the first sheet of wax paper back into the jar. Go through this step with all of the rest of the shapes. Then go back to the first shape you did and do it all over again. You will do a total of four coats of UTEE on EACH side. This will make the shapes look SOOOO awesome!!!! All of this tediousness is worth it at the end, believe me!!!

Next you need to make the mobile frame using a white wire clothes hanger. See the image below to see where to make the cuts using a wire cutter. Then use a knitting needle, pencil, or other sturdy round thin cylindrical object to wrap the ends of the wire around to curl the edges to make loops. This will be where you will tie the fishing line holding your woodland shapes. I used wire cutter to hold the end of the piece in place as I curled the wire around the knitting needle. Make sure the loops are both facing the same way and make sure your wire gets straightened out. The wire hanger I used gave me one 16-inch long segment and two 7-inch long segments.


Next comes the assembly. You are almost done!
Find a combination of two shapes that are of similar weight. You will use these two shapes as the end pieces for one of the 7-inch long segments. Do the same for the other 7-inch segment. You can see which I chose in the photos. They don’t have to be and exact weight match, it just helps with balancing the overall mobile.
Next, find the top center of balance for a shape by holding the shape between your fingers and finding the spot where the shape looks balanced. Punch a 1/8-inch hole with a Crop-a-dile. If the enamel cracks, just reheat it with the heating tool to smooth the crack out. Do this for each of the shapes.
Now tie your fishing line through the holes and up through the loop on the wire. Stagger the lengths of the line so that the pieces don’t all line up and bump into each other. Start with the two ends and then find the center of balance and tie the middle segment on. I used clear tape to wind around the wire on either end of the center segment to hold the center fishing line in place. Do this for the other 7-inch segment. Then use the same process to attach the two 7-inch segments to the 16-inch segment and attach the large swallow to the center, making sure everything is nice and balanced.
When I had it all together, I attached a length of fishing line to the top and attached it to the wall temporarily with a push pin to make any final adjustments to the balancing.


Now it is ready to hang from the ceiling. Make sure to hang the mobile high enough so baby can’t reach it, and make sure the mobile won’t fall down. This is not a mobile that baby should ever play with as there are small parts.
So there you have it. One Woodland Friends mobile that will bring you and your baby much joy and happiness. ☺
Have fun! Leave a comment to this post with a link to your completed mobile. Let me know if you have any questions!
-elke
Subscribe to:
Posts (Atom)
Popular Posts
-
 So, I've been wanting to make a dress for my little sprout to come home from the hospital in for some time now. I found this free patte...
 -
 I created a wall art focal point for the nursery to go just over the crib. It was super easy to make and thought I'd share how to do ...
 -
 I wanted to share with you the mobile I made for my yet to be born baby girl. Her nursery theme is Woodland Friends with lots of gno...
 -
 I woke up early on this fine first day of Kids Clothes Week to work on a tutu project that's been on my list for a while. The inspiratio...

